Start PowerShell as Administrator and do it:
PS C:\WINDOWS\system32> dism /online /Enable-Feature /FeatureName:IIS-IIS6ManagementCompatibility /all
Start PowerShell as Administrator and do it:
PS C:\WINDOWS\system32> dism /online /Enable-Feature /FeatureName:IIS-IIS6ManagementCompatibility /all
winrs -r:PCNAME cmd # see also winrm - Windows Remote Management (WinRM) WMIC: WMI command-line utility (https://learn.microsoft.com/en-us/windows/win32/wmisdk/wmic)wmic cpu get loadpercentagewmic ComputerSystem get TotalPhysicalMemorywmic OS get FreePhysicalMemory
1. Enter the text cd "C:\Program Files\Tracker Software\PDF-XChange Standard" and press Enter.
2. Enter pdfSaver.exe /AddPrinter <PrinterName> [/NoNotify] to create new copies of PDF-XChange Standard in the printers list.
The parameters operate as follows:
<AddPrinter> adds a new printer to the printers list.
<PrinterName> determines the printer name. If the printer name contains spaces then it must be enclosed in quotation marks, for example "Sample Printer ". A name different from those of existing printers must be used.
<NoNotify> is an optional parameter that prevents the sending of information about changes in the printers list to other applications.
https://habr.com/ru/company/ruvds/blog/594231/
[Quick Search] и [Deeper Search]).
Если данные на них видны, то можно спокойно сохранить их, разумеется,
на другой жёсткий диск. Если нет — то идти дальше по пунктам.sudo dd if="/dev/DISKNAME" of="/PATH/TO/IMAGE.dd" conv=sync,noerror (ее описание есть выше).https://www.virtualizationhowto.com/2020/10/reset-120-day-rds-grace-period-on-2016-and-2019/
If you have a home lab environment or other lab that you continually test various solutions, licensing and trial expiration is a challenge that you constantly tend to run into. It is just part of the fun of lab environments. While most trials are fairly “hard and fast” and don’t allow you to reset the trial expiration, if you work with Microsoft Windows Server and Remote Desktop Services (RDS), there is a “hack” that allows you to effectively reset the expiration of Remote Desktop Services grace period where you can essentially rewind the clock on your RDS licensing if you are making use of this role inside your lab environment. In my lab environment, I am making use of Windows Server 2019 for my Windows workloads. In this post, I will show how to reset 120 day RDS Grace period on 2016 and 2019 Windows Server. Let’s see.
When you install Windows Server 2016 or 2019 as with previous Windows versions, you get the normal ability to have the two sessions that you generally have available for administering. However, when you install the true Remote Desktop Services role, you have the ability to have multiple sessions to your server.
When you install the role, by default, you have a 120-day grace period that Microsoft gives you to properly license the server for use as an RDS installation. If you are using a server in a lab environment, most likely, you are not going to license this type of server outside of production.
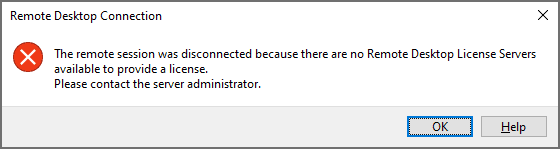
Once the 120 day grace period has expired, you will see the following error when you attempt to RDP to the server:

You can either redeploy your Windows Server which will allow you to spin up a new 120 day grace period, or you can actually reset the grace period. If you are like me, the latter is certainly the path of least resistance and work involved. Let’s take a look at how to reset the 120 day RDS grace period.
You can take a closer look at the official licensing documentation for Remote Desktop Services here:
For the exercise of resetting the 120 day grace period for the RDS role, the registry editor is your friend and makes this process easy. Before we begin, there are a couple of disclaimers to make here. Editing the registry can result in totally destroying a Windows system, so proceed with any low-level registry edits with caution. If you are working with a virtual machine, it is always a good practice to create a quick snapshot of the Windows virtual machine before you begin.
Additionally, for production systems, resetting the 120 day grace period should only be done for systems that are not in production as you should have proper licensing installed for production use.
To reset the grace period, there are actually just 3 steps involved:
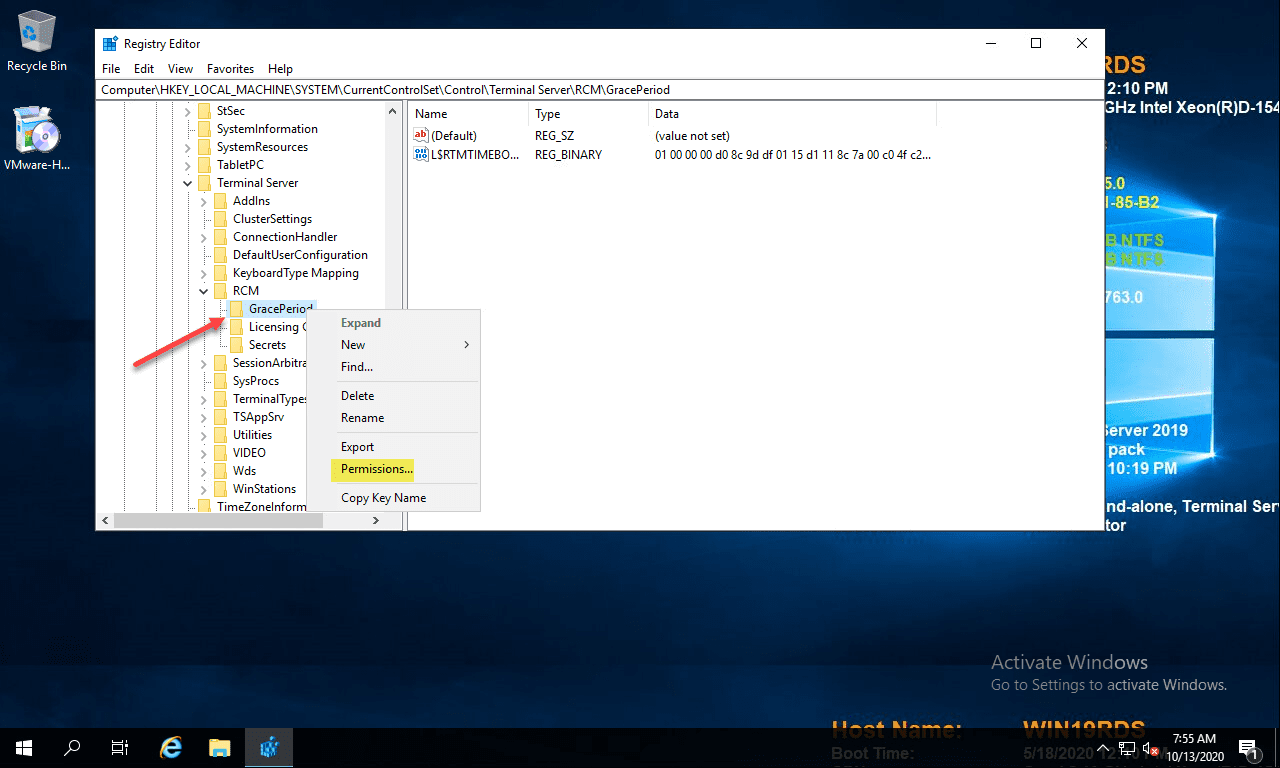
Now that we have level-set, once you have your snapshot or other backup created, you need to navigate to the following location on your RDS server:
ComputerHKEY_LOCAL_MACHINESYSTEMCurrentControlSetControlTerminal ServerRCMGracePeriod
After you have navigated to the key documented above, right-click GracePeriod and select Permissions.
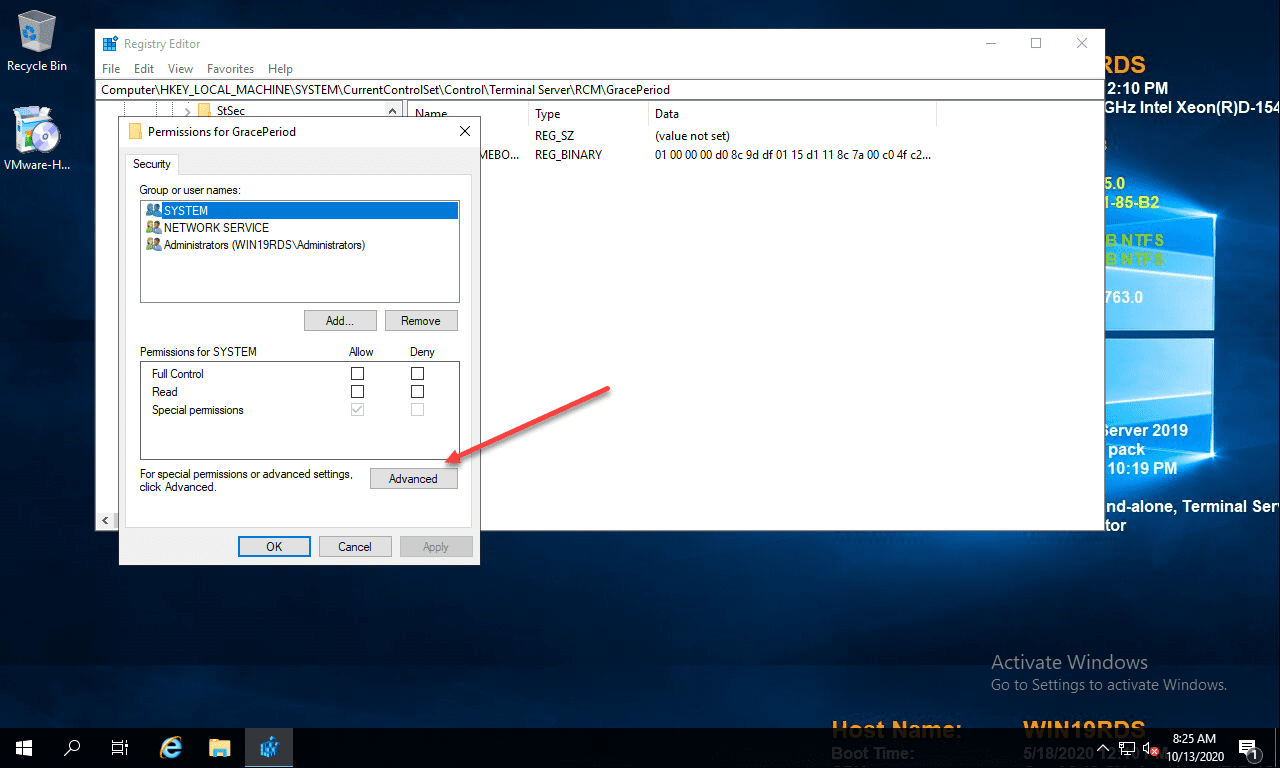
For obvious reasons, there are no default permissions on this key for even Administrators. So you have to first take ownership of the key before you can delete the timebomb value. Click the Advanced button on the permissions dialog box.
Click the Change button next to the Owner.
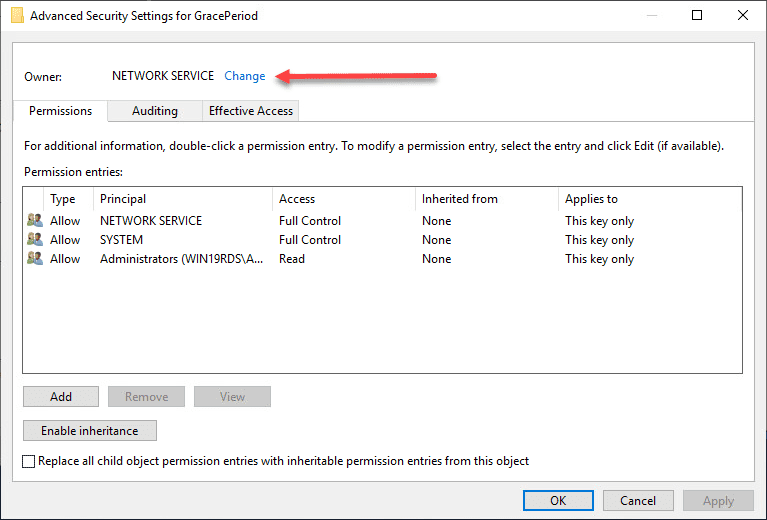
Here I have selected local administrators group as the owner of the key. However, you will want to choose whichever user/group that you want to use to delete the registry key. Select the options to replace owners and replace all child object permissions.
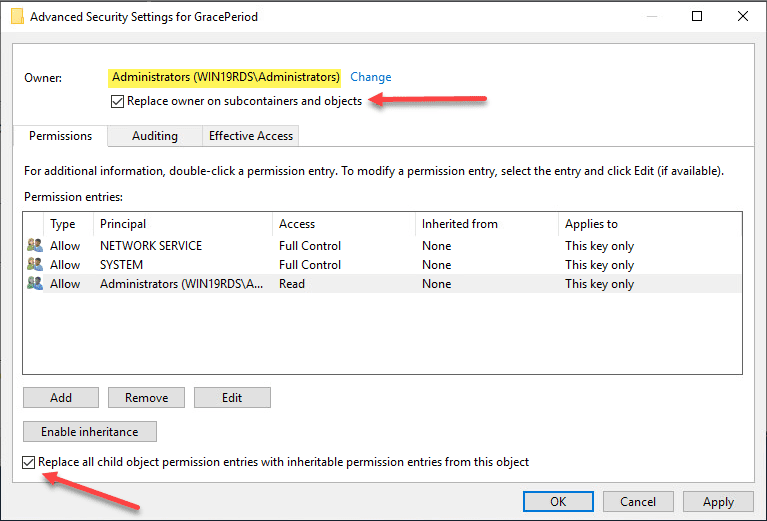
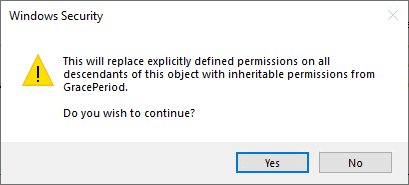
Confirm the replacement of permissions on the registry key.
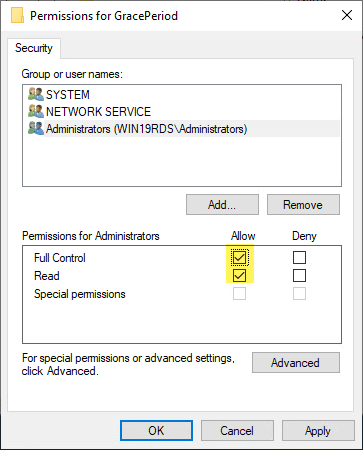
Now that we have changed ownership on the key, we can actually set permissions without getting permissions errors. Here I am granting administrators full control on the key.
Now, with permissions set, right-click the timebomb value in the GracePeriod key and Delete.
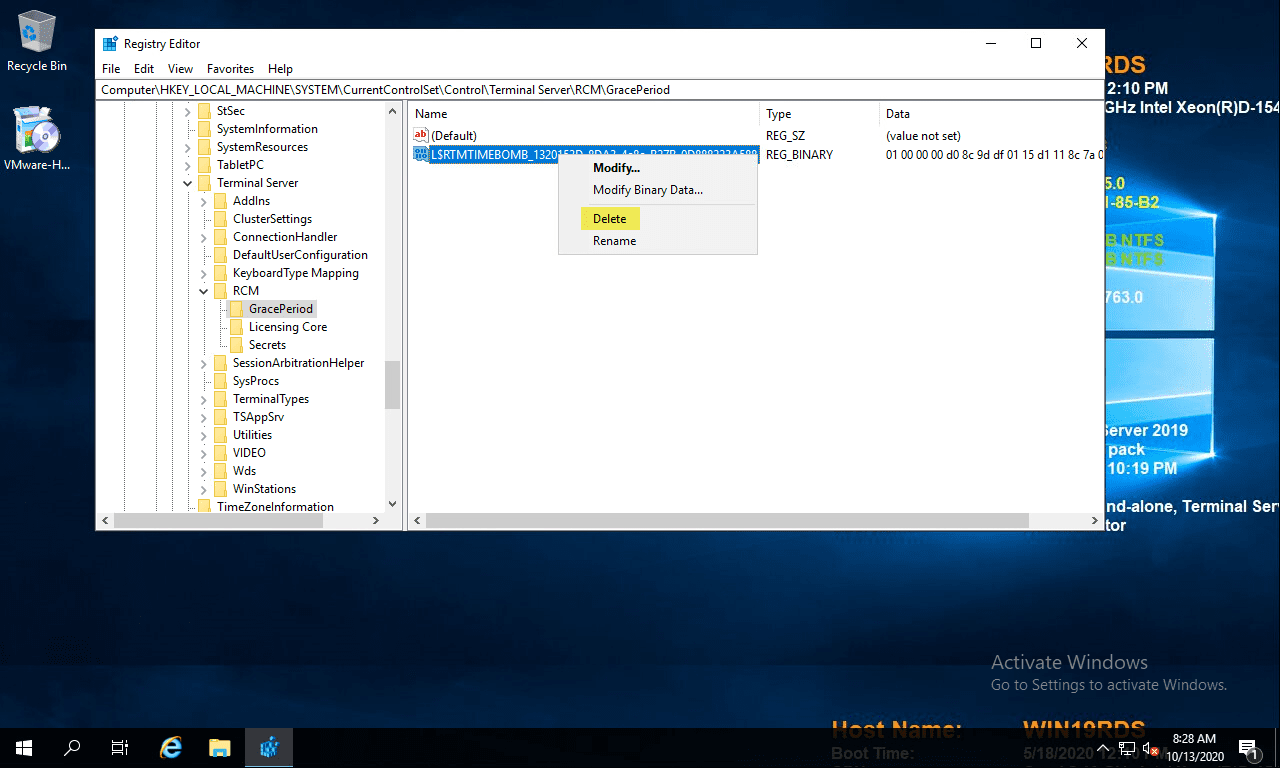
Confirm the deletion of the registry entry.

Next, the only thing left to do is reboot your server. Once the server is rebooted, you can enjoy once again having the full 120 day grace period for your RDS server in the lab environment.
Оригинал:
https://vc.ru/services/261079-kak-vernut-vpn-v-brauzere-opera
Столкнулся сегодня с такой проблемой , обнаружил что vpn в браузере опера не работает и пропал переключатель с панели. Починил следующим образом:
C:\Users\*НАЗВАНИЕ ВАШЕГО ПОЛЬЗОВАТЕЛЯ*\AppData\Roaming\Opera Software\Opera Stable
Secure Preferences и Secure Preferences.backup
«vpn»:{«blacklisted_locations»:[«cn»,«ru»],«last_established_location»:«RU»}}
«vpn»:{«blacklisted_locations»:[«cn»],«last_established_location»:«CN»}}
«vpn»:"blacklisted_locations":"935G71D2..","last_established_location":"A8B3326.."}
(цифры в кавычках могут отличаться).
"vpn":{"blacklisted_locations":["cn"],"last_established_location":"cn"
(Правой кнопкой мыши нажимаем на файл -> свойства -> слева внизу находим "Атрибуты:", ставим галочку напротив "Чтение"), -> "применить", "ок".
Проверьте чтобы vpn был активирован в настройках самой оперы: открыть "Все настройки браузера" -> листаем в самый низ -> дополнительно -> vpn